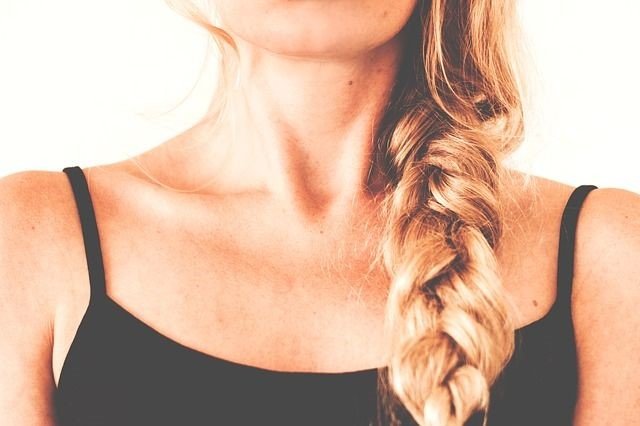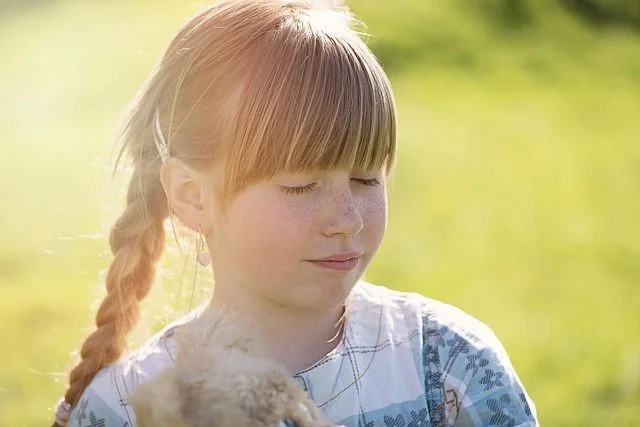
Braids are a versatile and practical hairstyle for an event or party of any kind, and even to look beautiful daily. They also look luxurious to be beautiful and comfortable when we go to the gym. It is one of the easiest hairstyles to perform and perfect to endure the whole day. If loose hair bothers you and your hair doesn’t support many hairstyles, root braids are perfect for you.
It should be noted that celebrities tend to wear a look of root braids on several occasions, it is quite common to see them when they walk on the red carpets. On the other hand, it is increasingly a trend in many scenarios and hair professionals say that the hairstyle is decisive to wear a perfect look from head to toe.
In addition, this can not only be seen on the fashion catwalks and carpets of celebrity events, you can also observe the root braids in the gym for being a comfortable hairstyle that does not allow a hair to escape and thus prevents it from disturbing during the practice of exercise.
In this article, we are going to show you the steps you need so that you yourself can learn to root them in the most perfect way, for you or for other people. There are several kinds of braids, however, here we are going to explain how to make yourself a great root braid that will help you in turn to fix your hair in a practical way when you want to wear a combed hair arranged in a comfortable and beautiful practical way.
To begin, you must organize all the utensils and have them at hand and thus avoid that you are walking from one side to the other, since when looking for what you need in the drawers, the braid can be loosened. Indeed, all you need is a rubber unless you want to make two braids or if your hair is cut into layers and some hair comes out, in that case you will need more rubber.
What do you need to make root braids?
Take care of your hair daily, giving it a good wash and applying beauty and health products according to your hair type.
Follow a useful guide to know what steps to take for your easy braids.
Instructions for making root braids
SIMPLE STEPS TO MAKE ROOT BRAIDS
- Straighten and detangle
Comb the hair until all the knots are removed. Once untangled, check that it is not frizzy, if so, isolate it using an iron
To start root braiding, the first thing you should do is select the main part of the hair as a strand.
You must start by separating the fraction of hair you have already selected into three parts, as if you were going to make a large braid with the remaining hair.- The Braided You can start braiding
the three strands and when you already have two braided, grab three strands of loose hair and continue braiding.
The operation continues to be repeated - It performs the braiding continuously in this way. To these strands with which we begin the braiding is added more and more hair from strand to strand.
- Use a comb
to help You achieve a perfect finish on the root braid, help yourself with a comb. It is very important that you are detailed and meticulous with the first strands since they will be the ones that are seen from the front. - The head
This is the most complex part since it will be the most obvious. Therefore, it is necessary that you completely collect the hair and that it is very well adjusted to the head inside the braid.
When the part of the head is ready, you must tighten the root braid well, completely adjust the braid so that it is compacted and also does not move.- The same braid as always
You only have to braid as well as traditionally you make a classic braid with what remains of hair. - Long
braid Root braids to make them look pretty and ideal should be braided into long hair, unless it is lower than the shoulders. - A discreet
rubber And finally, you only have to tie the braid with a rubber that should be thin or preferably transparent and thus avoid being very evident. - Root braid
Now you have a spectacular root braid, comfortable and practical to make.
OTHER STEPS TO ACHIEVE PERFECT ROOT BRAIDING
In today’s tutorial, we will learn how to make a root braid on one side, undulating the rest of the mane. We present other ways to get a hairstyle that favors you, is different and that looks with great volume.
To begin, the first step is to outline a mark in which a well-defined stripe is made to the side, which will subsequently be lengthened backwards. Start braiding the hair by taking a small fraction of hair that will be divided into three parts.
Subsequently, new sections of hair are added to lengthen the braiding to the tip. Then to leave the braid well fixed, use vegetable lacquer so that you can prevent the braid from falling apart. From there, it is time for more waves to be made in the rest of the hair. For that, the iron is used. The hair will be divided into small sections and little by little you will be waving.
The trend of this hairstyle is something rocker so the waves that are made, do not have to be so perfect. To achieve this, the hair is rolled with the style and a complete turn is made then slide the iron. With the help of the iron the hair breaks less and, in addition, more shine is obtained and also prevents damage to dyed hair.
Once you have finished the work of the waves, apply a little oil on the tips to leave them soft.
Already with the practical and simple steps that we show you here, you will be able to get a perfect look for any occasion day or night attracting attention with your spectacular root braid, allowing you to stand out with a fresh, elegant, comfortable, fun and even youthful image.
Tips for making root braids
Keep your spirits even though the first time it does not come out perfect, it is normal that initially it does not cost you, however, with perseverance and practice you will be able to become a great expert making root braids.
It is necessary that you remember to untangle and comb your hair well from the beginning so that when you take off your hairstyle you avoid finding abundant knots that become chaos and a nightmare. If you need the braid not to dishevel during the night when sleeping, you place lacquer right at the end of the braiding, just a little so that your hair does not look dirty.
If you are a girl with many tricks when combing your hair or deciding on a hairstyle, root braids are ideal to get out of the way, with these tips, you will see that you can play and invent your own designs with the volume you want that in many cases will also rejuvenate you.
A tip to avoid that when making the braid it forms as a kind of bag of hair half loose in the nape of the neck, is to detangle the hair very well before starting and also moisten it with a little water. Then you place oil so that the hair is very shiny, then with the straight and right face we can start to perform the calm.