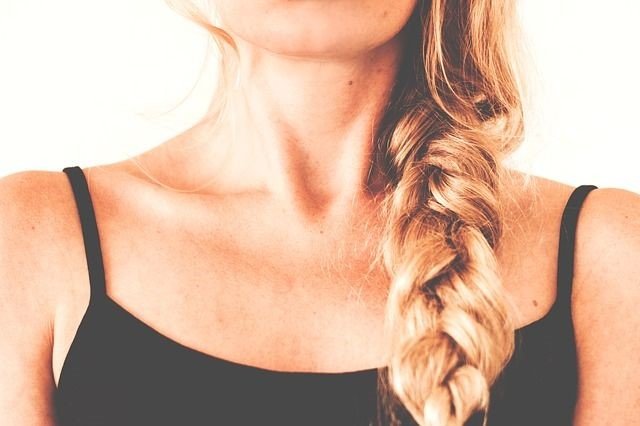
Having beautiful hair and looking beautiful is not impossible, you can look great if you learn how to make herringbone braids, since this hairstyle has been becoming a trend from a few years ago to today. Today we have seen artists like Rihana, Shakira, Meryem Uzerli and many more who are proudly wearing the herringbone braids that are currently some of the most trendy on social networks. That’s why you have to know how to make herringbone braids. In this way you can be part of this beautiful trend.
For more than 30 years in the past, women’s hair has drastically increased its overall damage. This is due to the excessive use of chemicals that wear and deteriorate the hair. If you read the composition of a shanpoo from the 40s and that of one of today, you will see that the amount of chemicals it has is immensely greater than a current shampoo and, although not all shampoos, conditioners or treatments damage the hair, many can be aggressive especially if we use them without measure.
Everything in excess is bad and that also includes stuffing our hair with products. Many women to have beautiful hair resort to ironing and other heat methods that damage the hair, as well as chemical methods and, when the hair is mistreated, instead of letting it rest and not damage it anymore, they continue to stylize the hair in a way that continues to be damaged. But it is not necessary for our hair to be sacrificed to have a great look. For centuries there are braids, which are a way to comb our hair without damaging our hair. From the humblest natives of prehistoric tribes to the queens of the highest classes, braids have figured among the favorite hairstyles of women in history and are still a trend today.
There are also many types of braids, so you can make several hairstyles without having to resort to the monotony of a style. You just need to know how to make various types of braids. It is for that reason that today I especially want to teach you how to make herringbone braids, since this hairstyle is very fashionable these days and is very easy to do, easier than you can imagine, because although it seems a complex hairstyle, it is quite simple and in a few minutes you will be able to master this technique of hairstyling. Braiding hair is an art. Take a comb, some garters and some wax to comb and get to work!
What do you need to make herringbone braid?
- Brush or comb
- Styling cream or hair oils
Instructions for making herringbone braid
- The most important thing we have to take into account before starting to comb our hair with braids, is to have it perfectly detangled and free of lint, dirt or things that can spoil the hairstyle or make it difficult for it to be done. That is why we have to detangle our hair and if possible, apply a little wax or oil to make it easier to slide your fingers between the hair. If you are one of the people who do not like the hair to look shiny or oily, then you can just put a few drops on your hands trying to rub very well.
- As the braids of two spikes require several strands of hair interspersed, to have a successful first time making these hairstyles, I recommend that you put a garter in your hair and so it will not move making it difficult for you to comb your hair or making the braid look chueca. The next thing we will do is divide our hair.
- The amount of hair that we will use to make this hairstyle, will depend a lot on the size of the tranzas that you want to have, so the more hair you monopolize, the thicker the braid will be. For this first attempt to go well, we recommend choosing a part of isolated hair with some elastic band or with all the hair, so you will have enough hair to maneuver and make the braid.
- Divide your hair into two approximately equal parts by making sure that the division starts from the top of the head or ponytail that you have done with the garter. Now that you have your hair divided into two parts, the most complex part will come; I’m talking about starting to make the braid. So that you better understand the way in which we are going to handle our hair, the strands on the left side will be called type A strands and the right side strands type B tufts.
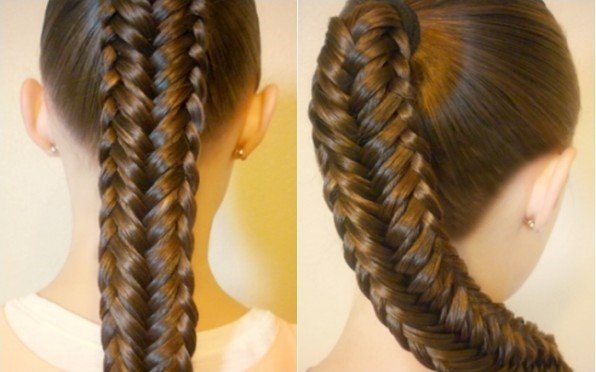
- From the highest part of the ponytail starting with the center of the back section, we will take two thin strands of the inner part between the strands and pass the thin strand on the left on the large strand on side A, then cross it below side B. We will also take a thin strand of the same approximate size on side B. and we will pass it in the same way on the thick strand and under the strand A. we will take another strand from the back of side A and pass it on the strand and under the strand B, then we will do the same with a strand behind the strand B, passing it on it and under the strand A.
- In this way each strand on the opposite side will end up being part of the opposite strand and we will be able to complement a braid in the shape of a spike. The main trick is that the small strands are the same size and are always taken from the same place. In this way we can get the braid to look uniform and make it easier to distribute the hair so that we can make the braid to the end without having difficulties. We can finish the braid with a garter so that it does not fall apart.
- One of the ways to facilitate this type of hairstyle is to pass the comb through the hair to detangle it while we are combing it and dividing the strands. In this way you can finish the braid without getting tangled and also, ensuring that the hair will be well placed in the right place. We can finish the braid by applying a little hairspray to fix the hairstyle, we can even undo the braid a little to give the appearance of more volume.
Tips for making herringbone braid
It is not advisable to use a lot of styling cream or wax because if the hair has too much product it can lose body or make it difficult to comb, on the contrary, if the hair is dry and the right product is applied, it will be easier to control the hair.
Remember not to use very oily products if your hair is very oily, there are products to moisturize and stylize the hair that do not damage it and that if applied in the right amount can make our hair look even better and stay healthy.
Believe it or not, the hair should not only be protected from the heat of stylizing tools, but also from the sun, that is why I recommend that you use a heat protector and special sun protector for hair, there are sprays and creams. Otherwise applying a little coconut oil can also help us protect our hair and also nourish our hair.