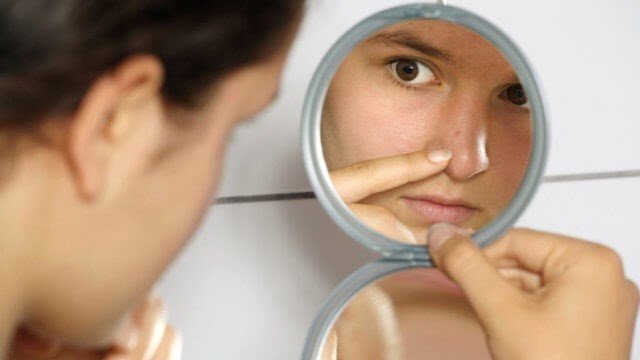
It is said that the eyes are “the mirror of the soul” and are usually the first thing that others see of us. That’s why we like them to look cute and expressive. The best way to accentuate our eyes, give it a beautiful shape and change the look is through makeup. However, it is not enough to make them up in any way. If you want a professional eye makeup, with the right tones and that favors you, you have to follow certain steps. Interested? well, here you will find in detail how to make a perfect eye makeup!
What do you need to make an eye makeup?
To make an ideal eye makeup you need to have in your bag:
- First eye or concealer
- Powders translucent or the same color as your skin
- Brushes to make up the eyes. Especially a round brush, but at the same time slightly pointed. It is important that you use this type of brush especially if you are a beginner, because it will be much easier to mix the shadows and the result will be spectacular.
- Eye shadow one or two shades darker than your skin
- Eye shadow somewhat darker than the previous one
- Light, bright, and/or metallic eye shadow Eyeliner (optional)
- Mascara
- False tabs (optional)
Instructions for making eye makeup
First eyes
First of all, it is highly recommended to apply on the eyelids a first. It is a product that serves to make the shadows look even more beautiful, more intense using less product, and that they remain for longer. If you do not use primer it is possible that the shadows are erased after a while and cracked. This is due to eyelid wrinkles and natural skin fat.
There are bases for special eyes, which you will find in the market as “eyeshadow primer”. However, for many it is more practical and economical to use the same concealer that is typically used for dark circles. In addition, it seems that the latter offers more coverage, so it can cover the veins of the eyelids and other imperfections. The concealers most used by makeup experts and that give better results are those of liquid format that include a small brush. It is essential that it is lighter tones than your skin.
In this way, apply the concealer on your eyelids and blur it a little with your fingers, with a special brush or a makeup sponge until it is uniform.
Seal with powders
The next step is going to be to seal the concealer. To do this, you can use translucent powders (which do not add any color), or an eye shadow of a tone very similar to that of your skin. It is very important that just before placing it, you close the eyelid and blur again the concealer or first one that you already applied (it may have cracked when you open your eyes). Next, keeping the eyelid closed, make it with the powder or shadow using an eye brush. Repeat the operation with the other eye. This step will allow no wrinkle to be marked, thus turning the eyelids into a uniform canvas on which to paint.
Transition tone
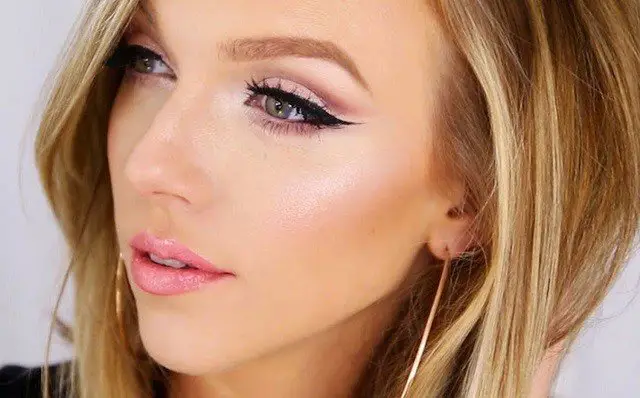
For this step, you’re going to use a shadow similar to your skin color, but one or two shades that are darker maximum. This is known as a transition tone and to identify it you can try different brown tones on your hand and see which one best fits your skin.
With the brush to mix shadows (round and slightly pointed), you will apply the product in the eye socket. To identify the area, try to feel the bone under the eyebrow. That’s where you should apply the transition shadow. The way to place it is from the end where the eye ends or “corner” through the entire eye socket. Use smooth “windshield” movements (from one side to the other) so that it is blurred and natural. Remember that in the corner or outside of the eye it should be more intense than in the part that approaches the tear.
If you think it has been very dark, it is possible to correct it using another brush impregnated with a lighter shadow. It blurs making small circular movements throughout the basin.
This step will highlight the shape of our eyes. However, there are cases in which we want to give another shape to the eyelid, as can happen with drooping eyelids. To do this, you can make up the upper area of the eye socket so that the mobile eyelid of your eye looks larger. It is as if you draw an “artificial” basin somewhat larger and elongated than that of the eye. Then, you can join the stroke with the corner of your eye by drawing a slight beak. The difference is that in the normal eye the beak would not be as accentuated as in the small eye, but more rounded.
Shadow to give depth
Once the transition shadow is finished, we will give some more depth to the eye. To do this, we will apply a somewhat darker color than the previous one. The shade will vary according to the shadow we want to use on the mobile eyelid. If you plan to apply a shade of warm tone (orange, reddish …) use browns that approach these shades. If, on the other hand, if you are going to use cold tones (such as blue, violet …), use a more muted brown and according to these tones.
It will be placed in the same way as the shadow of the previous step, intensifying the color a little on the outside or corner of the eye. Through small movements in circles with the brush, you will slightly merge this tone with the previous one.
Shade to give light
Next, you will make up your mobile eyelid with a shadow that provides light. That is, that it is more illuminated or clear than the ones you have used. The latest trends are shadows with glitter, glitter or metallic with an intense finish. They are placed with small taps on the eyelid using the fingers or a flat, round-tipped brush. It is recommended to apply the shadow a little higher than the mobile eyelid for a more professional finish and so that the fixed eyelid is not stained when opening the eyes. In addition, this will make our eyes look bigger and prettier.
On the other hand, you can add color to the look by applying another shadow on the outside of the eye and in the socket, perhaps something more colorful than the previous ones (but not as clear as that of the eyelid) such as a more vivid orange, purple, pink … Blur it a little through the mobile eyelid to make it look natural.
Shadow under the eye
If desired, apply some dark shade just below the eye and bring it into the corner. If your eye is small or droopy, make a straighter line from the center of the eye following to the “peak” you drew. Whereas, in the normal eye, it will be more rounded.
Eyeliner
Optionally you can outline your eyes with pencil, gel eyeliner or liquid. There are many ways to do it and there are many types of outline: they begin in the tear or in the center of the eye, with a corner or without a corner, thinner or thicker … It depends on your taste, the occasion and how flattering it is.
Eyelashes
Mascara is what will complete your eye makeup and make your look more feminine. The best way to place it is by performing zig-zag movements from the root of the eyelashes to their end.
If you dare, you can try the false eyelashes that are increasingly used in makeup tutorials. They are perfect for a special event or for evening parties. There are several types, the important thing for them to look good is that they are of quality and are placed just above the natural eyelashes so that they look integrated.
Once you know these steps, you can be as creative as you want: try different colors and tones, add different outlines, use matte or gloss shadows, add more light, try drawing the highest or lowest basin to see what favors your eye the most, etc.
Tips for making an eye makeup
- If you are looking for a night look and want to highlight the eyes, you can include more vivid and bright colors. You can make the different areas of the eye contrast stronger by shading the eye socket and corner with dark tones and the eyelid with very light and metallic tones.
- If you want a natural eye makeup, use matte shadows, brown, pink and orange tones and blur very well the makeup at every step.
- To enhance the look even more, try adding a touch of light to the tear of your eye using a white highlighter or light, bright shadow. Also place it just below and in the center of each eyebrow.
- To make small eyes appear larger, you can fill the water line with a white pencil. Then, outline only your upper eyelid with a dark pencil or eyeliner.
Don’t leave eye makeup for the latter, as it could fall shadow or mascara on your face and ruin the makeup you already made. One trick you can do to avoid this is to stick some makeup remover discs cut in half under your eyes so that they collect the possible remains of shadows. It is also recommended that, once the shade brush is soaked, it is given a few small taps to release the leftover powders (which are the ones that would fall on the face).